2022-02-03 20:59:56
 0
0
前言
这篇文章是我观看张荣超老师8月12日Service核心技术精要的直播后的学习笔记,温故而知新,跟着敲代码,跟着学知识,冲冲冲O(∩_∩)O
概述
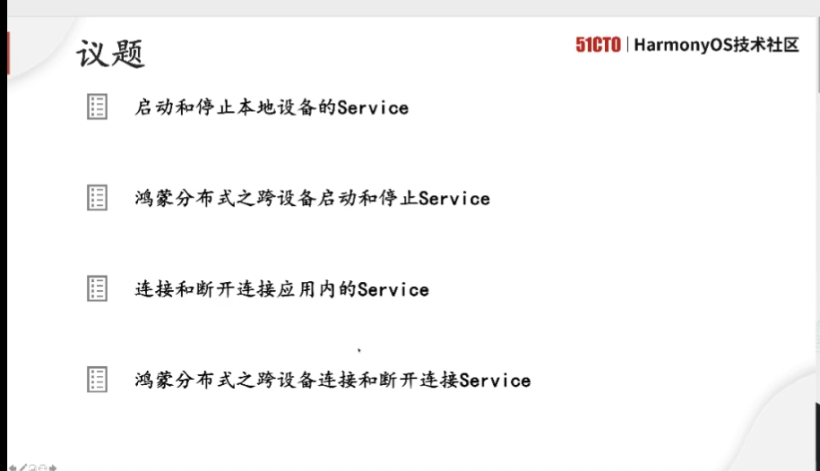 这是直播的主要内容,本文先对启动和停止本地设备的Service和跨设备启动和停止Service两个Demo做点笔记记录
正文
一.Service的相关知识
1.三大Ability:PageAbility,ServiceAbility,DataAbility,主要用于后台运行任务(如执行音乐播放、文件下载等),但不提供用户交互界面。Service可由其他应用或Ability启动,即
这是直播的主要内容,本文先对启动和停止本地设备的Service和跨设备启动和停止Service两个Demo做点笔记记录
正文
一.Service的相关知识
1.三大Ability:PageAbility,ServiceAbility,DataAbility,主要用于后台运行任务(如执行音乐播放、文件下载等),但不提供用户交互界面。Service可由其他应用或Ability启动,即
使用户切换到其他应用,Service仍将在后台继续运行。
2.Service是在主线程中运行的,如果要进行一些耗时操作,建议在ServiceAbility中创建子线程,以免堵塞主线程(为什么不建议在PageAbility中创建子线程呢?因为PA容易被系统和用户销毁,被销毁后就不再持有该子线程的引用了,而Service是单实例的,可以与多个PA建立联系,除非系统要回收内存资源,否则系统是不会销毁service的)
3.onStart(),该方法在创建Service的时候调用,用于Service的初始化。在Service的整个生命周期只会调用一次,调用时传入的Intent应为空。
onCommand(),在Service创建完成之后调用,该方法在客户端每次启动该Service时都会调用,开发者可以在该方法中做一些调用统计、初始化类的操作。参数boolean型的restart是用于表明service的启动模式,当值为true时表明service被系统销毁后重新启动,若值为false表明service是正常启动的;int型的startId表明service被启动的次数,每次service被启动是startId的值都会增1
onConnect(),在Ability和Service连接时调用,该方法返回IRemoteObject对象,开发者可以在该回调函数中生成对应Service的IPC通信通道,以便Ability与Service交互。Ability可以多次连接同一个Service,系统会缓存该Service的IPC通信对象,只有第一个客户端连接Service时,系统才会调用Service的onConnect方法来生成IRemoteObject对象,而后系统会将同一个RemoteObject对象传递至其他连接同一个Service的所有客户端,而无需再次调用onConnect方法。
onDisconnect(),在Ability与绑定的Service断开连接时调用。
onStop(),在Service销毁时调用。Service应通过实现此方法来清理任何资源,如关闭线程、注册的侦听器等
二.启动和停止本地设备的Service
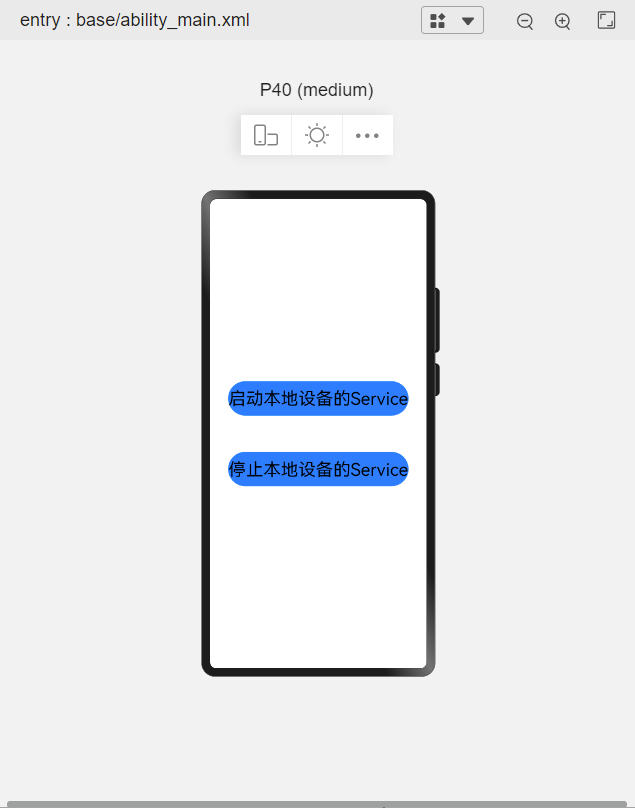
1.界面布局
- <?xml version="1.0" encoding="utf-8"?>
- <DirectionalLayout
- xmlns:ohos="http://schemas.huawei.com/res/ohos"
- ohos:height="match_parent"
- ohos:width="match_parent"
- ohos:alignment="center"
- ohos:background_element="$graphic:background_ability_main"
- >
- <Button
- ohos:id="$+id:btn_start"
- ohos:height="match_content"
- ohos:width="match_parent"
- ohos:text="启动本地设备的Service"
- ohos:text_color="#000000"
- ohos:background_element="$graphic:background_button"
- ohos:left_margin="30vp"
- ohos:right_margin="30vp"
- ohos:top_margin="30vp"
- ohos:bottom_margin="30vp"
- ohos:top_padding="10vp"
- ohos:bottom_padding="10vp"
- ohos:auto_font_size="true"
- />
- <Button
- ohos:id="$+id:btn_stop"
- ohos:height="match_content"
- ohos:width="match_parent"
- ohos:text="停止本地设备的Service"
- ohos:text_color="#000000"
- ohos:background_element="$graphic:background_button"
- ohos:left_margin="30vp"
- ohos:right_margin="30vp"
- ohos:top_margin="30vp"
- ohos:bottom_margin="30vp"
- ohos:top_padding="10vp"
- ohos:bottom_padding="10vp"
- ohos:auto_font_size="true"
- />
- </DirectionalLayout>
在onStart中创建子线程来播放音乐,代码如下
- public class ServiceAbility extends Ability {
- private static final HiLogLabel LABEL_LOG = new HiLogLabel(3, 0xD001100, "Demo");
- private Player player=new Player(this);
- @Override
- public void onStart(Intent intent) {
- HiLog.info(LABEL_LOG, "onStart()被调用了");
- super.onStart(intent);
- EventRunner eventRunner = EventRunner.create(true);
- EventHandler eventHandler = new EventHandler(eventRunner);
- eventHandler.postTask(new Runnable() {
- @Override
- public void run() {
- try {
- RawFileDescriptor rawFileDescriptor = getResourceManager()
- .getRawFileEntry("resources/rawfile/test.mp3")
- .openRawFileDescriptor();
- Source source = new Source(rawFileDescriptor.getFileDescriptor(),
- rawFileDescriptor.getStartPosition(),
- rawFileDescriptor.getFileSize());
- player.setSource(source);
- player.prepare();
- player.play();
- }catch(IOException e){
- e.printStackTrace();
- }
- }
- });
- }
- @Override
- public void onCommand(Intent intent, boolean restart, int startId) {
- HiLog.info(LABEL_LOG, "onCommand()被调用了,第%{public}d次后被启动",startId);
- }
- @Override
- public void onBackground() {
- super.onBackground();
- HiLog.info(LABEL_LOG, "onBackground()被调用了");
- }
- @Override
- public void onStop() {
- super.onStop();
- HiLog.info(LABEL_LOG, "onStop()被调用了");
- if(player.isNowPlaying()){
- player.stop();
- player.release();
- }
- }
- }
DeviceId:表示设备ID。如果是本地设备,则可以直接留空;如果是远程设备,可以通过ohos.distributedschedule.interwork.DeviceManager提供的getDeviceList获取设备列表,
BundleName:表示包名称。
AbilityName:表示待启动的Ability名称。
打开MainAbilitySlice,添加代码
- public class MainAbilitySlice extends AbilitySlice {
- @Override
- public void onStart(Intent intent) {
- super.onStart(intent);
- super.setUIContent(ResourceTable.Layout_ability_main);
- Intent serviceIntent = new Intent();
- Operation serviceOperation = new Intent.OperationBuilder()
- .withDeviceId("")
- .withBundleName(getBundleName())
- .withAbilityName(ServiceAbility.class.getName())
- .build();
- serviceIntent.setOperation(serviceOperation);
- Button btnStart = (Button)findComponentById(ResourceTable.Id_btn_start);
- btnStart.setClickedListener(component -> {
- startAbility(serviceIntent);
- });
- Button btnStop = (Button)findComponentById(ResourceTable.Id_btn_stop);
- btnStop.setClickedListener(component -> {
- stopAbility(serviceIntent);
- });
- }
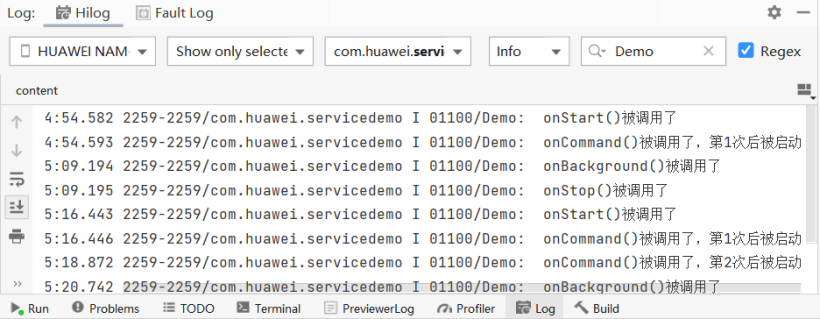
如果Service尚未运行,则系统会先调用 onStart() 来初始化Service,再回调Service的 onCommand() 方法来启动Service。
如果Service正在运行,则系统会直接回调Service的 onCommand() 方法来启动Service。
Service一旦创建就会一直保持在后台运行,除非必须回收内存资源,否则系统不会停止或销毁Service。开发者可以在Service中通过 terminateAbility() 停止本Service或在其他Ability调用 stopAbility() 来停止Service。
连接真机去调试,日志打印如下
三.跨设备启动和停止Service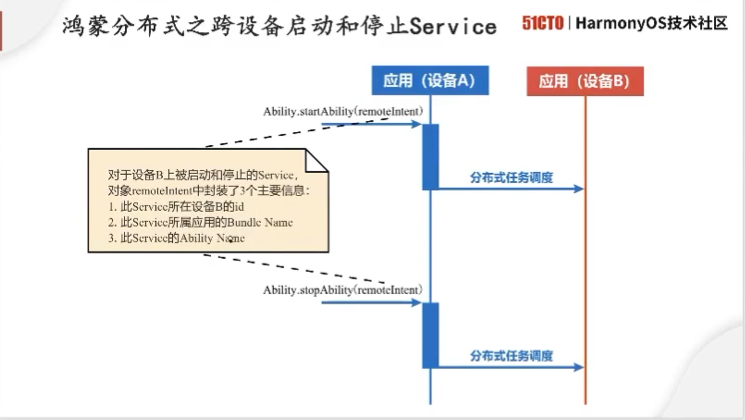 1.添加权限
第一个权限是获取分布式组网内的设备列表和设备信息,第二个权限是用于获取分布式组网内的设备的状态变化,第三个权限是用于查询其他应用的信息,第四个权限用于不同设备间的数据交换;前三个为非敏感权限,第四个为敏感权限。
已在config.json文件中声明的非敏感权限,会在应用安装时自动授予,该类权限的授权方式为系统授权(system_grant)。
敏感权限需要应用动态申请,通过运行时发送弹窗的方式请求用户授权,该类权限的授权方式为用户授权(user_grant)。
代码分别如下:
/config.json/
1.添加权限
第一个权限是获取分布式组网内的设备列表和设备信息,第二个权限是用于获取分布式组网内的设备的状态变化,第三个权限是用于查询其他应用的信息,第四个权限用于不同设备间的数据交换;前三个为非敏感权限,第四个为敏感权限。
已在config.json文件中声明的非敏感权限,会在应用安装时自动授予,该类权限的授权方式为系统授权(system_grant)。
敏感权限需要应用动态申请,通过运行时发送弹窗的方式请求用户授权,该类权限的授权方式为用户授权(user_grant)。
代码分别如下:
/config.json/
- "reqPermissions": [
- {
- "name": "ohos.permission.GET_DISTRIBUTED_DEVICE_INFO"
- },
- {
- "name": "ohos.permission.DISTRIBUTED_DEVICE_STATE_CHANGE"
- },
- {
- "name": "ohos.permission.GET_BUNDLE_INFO"
- },
- {
- "name": "ohos.permission.DISTRIBUTED_DATASYNC"
- }
- ]
- public class MainAbility extends Ability {
- @Override
- public void onStart(Intent intent) {
- super.onStart(intent);
- super.setMainRoute(MainAbilitySlice.class.getName());
- String[] permissions = { "ohos.permission.DISTRIBUTED_DATASYNC"};
- List<String> canRequestPermissions = new ArrayList<>();
- for(String permission:permissions){
- if(verifySelfPermission(permission)!= IBundleManager.PERMISSION_GRANTED){
- if(canRequestPermission(permission)){
- canRequestPermissions.add(permission);
- }
- }
- }
- requestPermissionsFromUser(canRequestPermissions.toArray(new String[0]),0);
- }
- }
- public class DeviceUtils {
- public static List<String> getOnlineDeviceIdList(){
- List<DeviceInfo> onlineDeviceInfoList =
- DeviceManager.getDeviceList(DeviceInfo.FLAG_GET_ONLINE_DEVICE);
- if(onlineDeviceInfoList == null || onlineDeviceInfoList.isEmpty()){
- return null;
- }
- List<String> onlineDeviceIdList = new ArrayList<>(onlineDeviceInfoList.size());
- onlineDeviceInfoList.forEach(onlineDeviceInfo -> {
- onlineDeviceIdList.add(onlineDeviceInfo.getDeviceId());
- });
- return onlineDeviceIdList;
- }
- }
- public class MainAbilitySlice extends AbilitySlice {
- @Override
- public void onStart(Intent intent) {
- super.onStart(intent);
- super.setUIContent(ResourceTable.Layout_ability_main);
- Intent remoteIntent = new Intent();
- List<String> onlineDeviceIdList = DeviceUtils.getOnlineDeviceIdList();
- if(onlineDeviceIdList != null || !onlineDeviceIdList.isEmpty()){
- String remoteTargetDeviceId = onlineDeviceIdList.get(0);
- Operation serviceOperation = new Intent.OperationBuilder()
- .withDeviceId(remoteTargetDeviceId)
- .withBundleName(getBundleName())
- .withAbilityName(ServiceAbility.class.getName())
- .withFlags(Intent.FLAG_ABILITYSLICE_MULTI_DEVICE)
- .build();
- remoteIntent.setOperation(serviceOperation);
- }
- Button btnStart = (Button)findComponentById(ResourceTable.Id_btn_start);
- btnStart.setClickedListener(component -> {
- startAbility(remoteIntent);
- });
- Button btnStop = (Button)findComponentById(ResourceTable.Id_btn_stop);
- btnStop.setClickedListener(component -> {
- stopAbility(remoteIntent);
- });
- }
声明:本文内容及配图由入驻作者撰写或者入驻合作网站授权转载。文章观点仅代表作者本人,不代表电子发烧友网立场。文章及其配图仅供工程师学习之用,如有内容图片侵权或者其他问题,请联系本站作侵删。
侵权投诉


